
Specifically for StorageGRID
In this article, policies for S3 Buckets are going to explained in two ways – using Groups Policies, where a policy is defined within a Group, and users are then added to the group, to give them the rights defined by the group. The other option is to use Bucket Level Policies where the policies are defined at the Bucket Level.
The simplest Option is to use Group and User Policies, where you can define the correct polices at the Group level, and then add users to the correct groups as required.
There is a third option, which is Object Level Polices, where you define rights to individual object, but these are no longer recommended as best practice, due to the amount of work to maintain these sort of polcies.
For the purposes of this article we are using the following Users, Groups, Buckets and folders, which can be setup within the Tenant Manager in StorageGRID
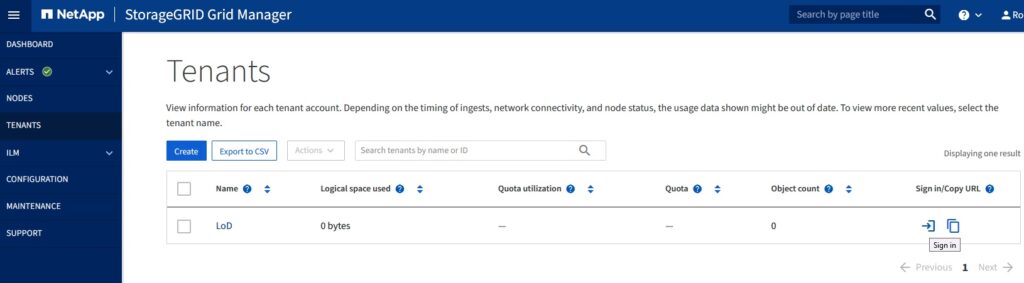
Firstly login to the Tenant Manager in StorageGRID:

Create 3 Users, and 3 Groups.
User1, User2, User3
Group1, Group2, Group3
The following Bucket and folder structure.
Bucket1/folder1
Bucket2/folder2
Bucket3/folder3/user1
Bucket3/folder3/user2
Bucket3/folder3/user3
Once you have created the Groups, select a Group, and goto to the S3 Policy Tab – this is where the policy is defined in JSON, and there are several elements, some of the more commonly used ones are Effect, Action and Resource.
Effect:
– what you want to Allow or Deny access to.
For example
“Effect”: “Allow”
“Effect”: “Deny”
Action:
– what you what to do, this could be everything ‘*’ or a subset of this, for this there are loads of different options, but include ListObject, GetObject, PutObject, ListBucket. Note here you define both at the ‘Bucket’ level, and also at the Object Level.
For Example:
“Action”: “s3:”
“Action”: “s3:ListAllMyBuckets”,”s3:ListBucket”,”s3:GetObject”,”s3:PutObject”
There is a specific action which is important, and that is the action to ‘ListAllMyBuckets’ this is required if you are browsing an S3 structure, as without it, you will not be able to ‘see’ what is there, so as a minimum this should be in place. You can get round this, by removing this right, but then you will have to explicty define the bucket you need to see in the application using it.
Resource
– what you want the Effect and Action to apply to, this could be everything ‘*”, or a particular bucket, or a particular bucket/folder structure.
Remember here, that as s3 is a flat filestucture, the concept of folders within an s3 namespace, is not really there, it is just a way of making it easier for people to visualise it.
For Example:
“Resource”: “arn:aws:s3:::*”
“Resource”: “arn:aws:s3:::bucket1/*”
“Resource”: “arn:aws:s3:::bucket1/folder1/*”
Putting it all together:
You must start with ‘{‘ and end with a ‘}’
All the Statements are defined within the ‘Statement’ and are included within ‘[ ]’
If you want mulitple conditions with they must also by separated by a , and also surrounded by ‘[ ]’
It is also good practice (but not required) to add a descriptive file or ‘Sid’ (Statement ID) to describe what the JSON actually does.
First Example – allow everything for the Action ‘s3’ to everybody, or ‘root’ access.
{
“Statement”: [
{
“Sid”: “Allow Full Access to all s3 Buckets”,
“Effect”: “Allow”,
“Action”: “s3:“,
“Resource”: “arn:aws:s3:::*”
}
]
}
So far so good:
The other extreme is no access:
In which case the s3 policy will be blank – which means no access.
The next stage is read/only access, which can be achieved in a number of ways, depending on whether you want users to be able to list other buckets or not. The first approach allows listing of all buckets, but no ability to download(GET) or upload files(PUT)
{
“Statement”: [
{
“Effect”: “Allow”,
“Action”: [
“s3:ListAllMyBuckets”,
“s3:ListBucket”,
“s3:ListBucketVersions”
],
“Resource”: “arn:aws:s3:::*”
}
]
}
Note here we have not specified GetObject – so even though you can see what’s in the bucket – you cannot download the files.
To allow users to both list the contents of the bucket, and read (GET) and download the files, we need to add the GET Action, this will allow anyone in this group to list any bucket contents, and download the files. Note have also added ‘GetObjectVersion’ to allow you see the versions of an Object, and also ‘GetObjectTagging’ to allow ‘Tags or Metadata’ for the object to be read, but not changed (as that would require the ‘PUT’ Action.
{
“Statement”: [
{
“Effect”: “Allow”,
“Action”: [
“s3:ListAllMyBuckets”,
“s3:ListBucket”,
“s3:ListBucketVersions”,
“s3:GetObject”,
“s3:GetObjectTagging”,
“s3:GetObjectVersion”,
“s3:GetObjectVersionTagging”
],
“Resource”: “arn:aws:s3:::*”
}
]
}
If you want to go a step further, and stop people listing the contents of the buckets, this can be achieved by either removing some rights, or explicitly denying access to a particular bucket.
So far we have applied permission across all buckets, in practice you would want to limit users access to certain buckets, combining this with what has been mentioned so far.
Restrict Access to a certain bucket – building on the read only policy you can add back permissions for a certain bucket, by adding adding an ‘Allow’ Effect for any s3 action, in a specific resource – in this case ‘bucket1’
{
“Statement”: [
{
“Effect”: “Allow”,
“Action”: [
“s3:ListAllMyBuckets”,
“s3:ListBucket”,
“s3:ListBucketVersions”
],
“Resource”: “arn:aws:s3:::” }, { “Effect”: “Allow”, “Action”: “s3:“,
“Resource”: “arn:aws:s3:::bucket1/*”
}
]
}
Going a step further you can explicitly specific a folder within a bucket, to restrict access even more, by adding the folder name after the bucket name in the resource field.
“Resource”: “arn:aws:s3:::bucket2/folder2/*”
This is still all a bit manual, so the next step is to pass the username variable across, which can be a subdirectory of a folder:
{
“Statement”: [
{
“Effect”: “Allow”,
“Action”: [
“s3:ListAllMyBuckets”,
“s3:ListBucket”,
“s3:ListBucketVersions”
],
“Resource”: “arn:aws:s3:::” }, { “Sid”: “AllowListBucketOfASpecificUserPrefix”, “Effect”: “Allow”, “Action”: “s3:ListBucket”, “Resource”: “arn:aws:s3:::bucket3”, “Condition”: { “StringLike”: { “s3:prefix”: “${aws:username}/“
}
}
},
{
“Sid”: “AllowUserSpecificActionsOnlyInTheSpecificUserPrefix”,
“Effect”: “Allow”,
“Action”: “s3:Object”, “Resource”: “arn:aws:s3:::bucket3/${aws:username}/“
}
]
}
Bucket Level Policies:
Firstly a note on how to apply bucket level policies:
You can use something like S3Browser, or Cyberduck to directly edit these policies or more programmatically with something like aws cli, which is more recommended. If you are using AWS cli – make sure you are using the latest version (version 2 at time of writing and remove the older versions first:
Check latest version of aws (should be 2)
aws –version
aws-cli/2.4.17 Python/3.8.8 Darwin/21.2.0 exe/x86_64 prompt/off
Run the configure utility for aws cli:
aws configure
Configure direct for aws – otherwise need to specify a profile for SG, and no verify ssl and endpoint to target the storage node or gateway:
This will assume you are using aws s3 – but if you are not – no problem:
Create a new profile for SG in .aws/credentials:
Similar to:
[webscale]
aws_access_key_id = CZ5C6H74NW5OUEILS2KX
aws_secret_access_key = Hv2352g/8cFPRNX3fXyoGCiRGEfiHcEIm3hUB2Tc
Then reference it with —profile and if no certs add —no-verify-ssl
Example:
aws>aws s3 ls –profile webscale –endpoint-url https://dc1-g1.demo.netapp.com:10443 –no-verify-ssl
Should return a list of buckets – you are all good to go with aws cli, and can run a python3 script, referencing the approach config section in the credentials and config files.
These are enforced at the bucket level using the aws s3api put-bucket-policy, referencing a json file with the following, (exactly the same as you would use in the above examples)
{
“Statement”: [
{
“Sid”: “AllowEveryoneReadOnlyAccess”,
“Effect”: “Allow”,
“Principal”: ““, “Action”: [ “s3:GetObject”, “s3:ListBucket” ], “Resource”: [“arn:aws:s3:::bucket4”,”arn:aws:s3:::bucket4/“]
} ]
}
aws s3api put-bucket-policy –bucket bucket4 –policy file://myfile.txt –profile webscale –endpoint-url https://dc1-g1.demo.netapp.com:10443 –no-verify-ssl
to confirm the policy has been applied to the bucket use the get-bucket-policy to return the policy against the bucket:
aws s3api get-bucket-policy –bucket bucket4 –profile webscale –endpoint-url https://dc1-g1.demo.netapp.com:10443 –no-verify-ssl
{
{“Statement”:[{“Sid”:”AllowEveryoneReadOnlyAccess”,”Effect”:”Allow”,”Principal”:”“,”Action”:[“s3:GetObject”,”s3:ListBucket”],”Resource”:[“arn:aws:s3:::bucket4”,”arn:aws:s3:::bucket4/“]}]}
Append ‘output text > myfile.json’ which can then be edited easily.
Note with this policy unless you have sufficient rights, you would not be able to examine the bucket policy, delete or upload files, so the same as the read only policy described above.
In order to be able to read (not change) the bucket Policy – need to add GetBucketPolicy rights to the Bucket Policy.
{“Statement”:[{“Sid”:”AllowEveryoneReadOnlyAccess”,”Effect”:”Allow”,”Principal”:”“,”Action”:[“s3:GetObject”,”s3:GetBucketPolicy”,”s3:ListBucket”],”Resource”:[“arn:aws:s3:::bucket4”,”arn:aws:s3:::bucket4/“]}]}
To have right to change the Bucket Policy – need to add PutBucketPolicy to the list of allowed actions.
This is a simple run through of permissions that can be applied to buckets within s3, the next item to cover is automating the application of policies using the aws cli and Python.